When you purchase through links on our site, we may earn a commission. Here’s how it works.
Installing a security system can sound intimidating, but Ring Alarm couldn’t make it more simple. Whether you’ve already bought your Ring Alarm security system or you’re thinking about getting one and want to know what you’re getting into, this article by our home security expert Kimberly has the instructions (and a step-by-step video) on how to get your Ring Alarm system up and running.
How To Install Your Ring Alarm Security System
Setting up your Ring Alarm security system is super simple. Follow the steps below in our Ring Alarm setup guide to get started.
Create An Account
The first thing you’ll want to do is create your Ring account. The Ring app walks you through the process, and an instructional booklet is also included in your equipment package.
- Install the Ring app for your iOS or Android device
- Create an account if you’re new to Ring or log in to your existing account
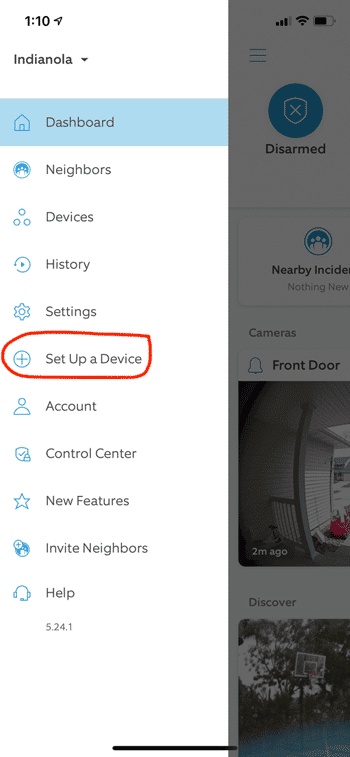
Click ‘Setup A Device’
- From the menu, tap “Set Up A Device”:
Specify Your Device
- Tap “Security Devices” followed by “Base Station” (for your Ring Home Security system, this is the brains, and is the first component you’ll want to setup).
Provide Your Address
Ring will ask for your address and phone number. Enter it now.
Why Does Ring Need My Address And Phone Number?
- Follow the steps of plugging it in, pairing it, connecting it to the internet, etc., which are given through the app
- Continue to set up additional devices (keypad, range extender, motion detectors, contact sensors, etc.)
Choose A Spot
Choose a location for your base station.
Location & Placement Tips For Your Ring Base Station
- Place it on a flat surface or mount it on a wall (screws and anchors not included).
- Make sure it’s in a spot that gets great wifi reception or near your router if you want to use an Ethernet connection.
- Install in an area where the siren is best heard throughout the location.
- Choose a centralized location to improve Z-Wave network coverage in all directions.
- Make sure the spot you choose has cellular service, in case you want to subscribe to Ring Protect Pro and take advantage of cellular backup.
Video: Ring Alarm & Doorbell Installation
The video below has a quick overview of it all, but there are also more detailed instructions below.
Contact Sensors
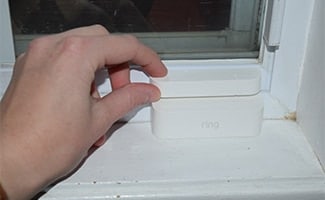
You can install contact sensors on any door or window to alert you when they open or close. It doesn’t matter which direction you install them or whether the sensor or magnet is on the trim. Just make sure the notches align and are no more than 1/2″ apart.
- Connect the sensor to your Ring Alarm: Pull the tab from the back (don’t pull out all of the device tabs at once)
- Configure any unique settings: Choose the sensor placement, give it a unique name describing the location and assign it to a room.
- For contact sensors going on doors, remember to decide if it’s a primary or secondary door. Primary doors have entry and exit delays* to prevent accidental alarm triggers.
- Install the device:
- Clean the door or window surface with rubbing alcohol to ensure a secure installation
- Use the screws or tape to mount the device brackets
- Snap the sensor and magnet onto their brackets
*Entry & Exit Delays: The allotted time given to leave or enter your home before the system is fully armed or alarmed. This allows you to arm your system and leave your home as well as re-enter your home and disarm the system within the set time period without setting the system off. You can choose between 0 and 180 seconds.
Motion Detectors
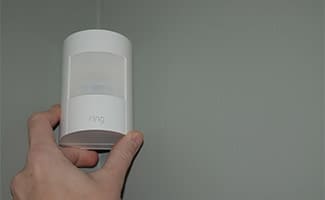
You should place motion detectors in the rooms and hallways an intruder would likely pass through.
- Install 7 feet above the floor
- Can place in a corner or on a flat wall
- Shouldn’t face a heat source (stove, fireplace or windows with direct sunlight)
- Detectors ignore pets under 50 pounds when set to the lowest motion sensitivity settings
To Install:
- Connect the motion detector to your Ring Alarm: Pull the tab from the back (don’t pull out all of the device tabs at once)
- Configure any unique settings: Choose the sensor placement, give it a unique name describing the location and assign it to a room
- Install the device:
- Clean the wall with rubbing alcohol to ensure a secure installation
- Use the screws or tape to mount the bracket to the wall
- Snap the motion detector onto its bracket
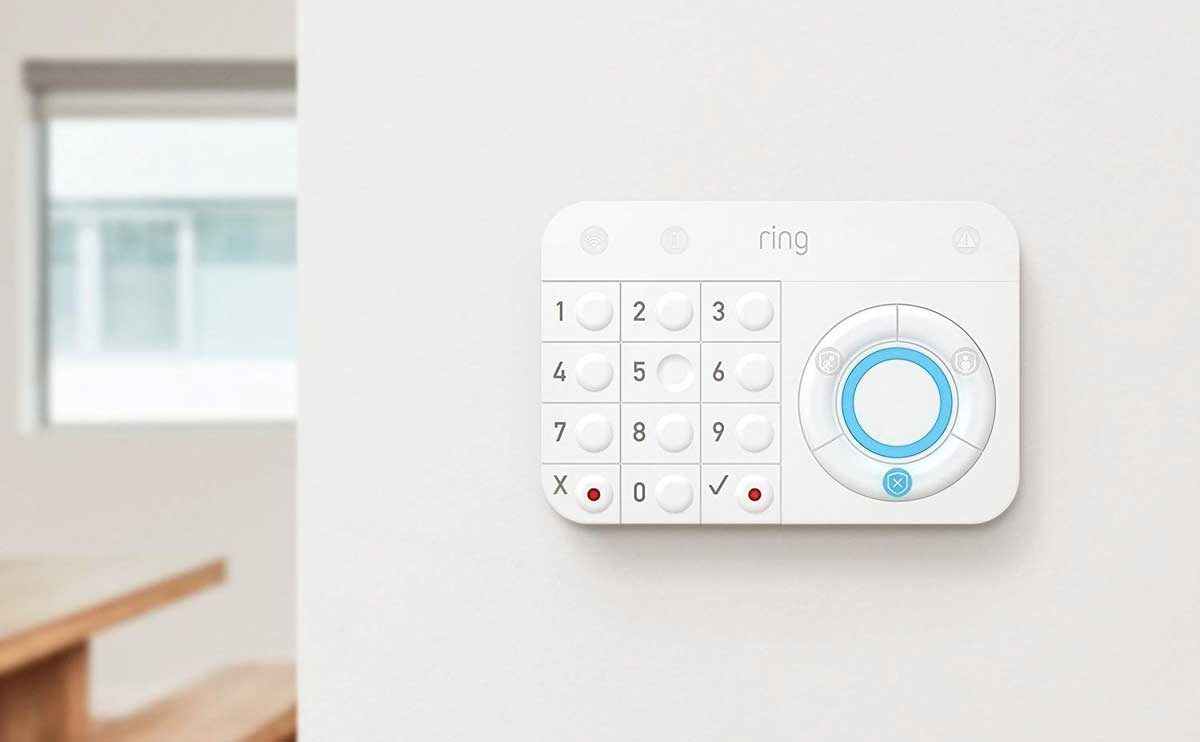
Keypad
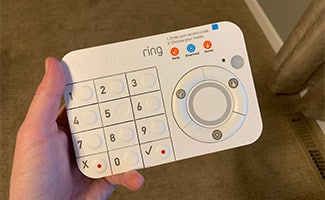
The keypad is where you arm and disarm the security system. It’s best to place it in the hallway or near the door you use most often to enter and exit your home. Some people choose to install a second keypad in their bedroom for easy access at night.
- Connect the device to your Ring Alarm: Plug the keypad into an outlet with the included USB cable and wall adapter
- Configure any unique settings: Give it a unique name describing the location, assign it to a room and create a personal access code to arm and disarm your system
- Install the device: Mount it on a wall or place it on a table
Range Extender
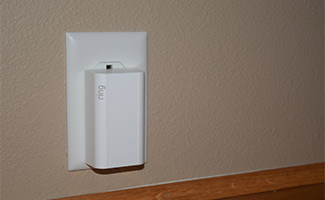
Range extenders expand the range of your Ring Alarm network and enable the devices to reach the base station.
- Connect the device to your Ring Alarm: Plug it into an outlet for pairing
- Configure any unique settings: Give it a unique name describing the location and assign it to a room
- Install the device: Plug it into an outlet between your base station and one or more Ring Alarm sensors (it’s recommended to put it between the most distant sensor from your base station)
Smoke & CO Listener
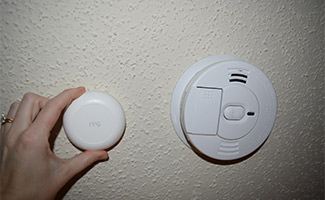
The smoke and CO (carbon monoxide) listener doesn’t sense smoke or CO directly; instead, it adds smart functionality to your existing smoke or CO alarm. When your smoke or CO alarm sounds, the smoke and CO listener activates, and you’re notified of the issue (if you have professional monitoring, the monitoring station is notified as well).
- Find a place for the bracket within 6 inches of your smoke or CO alarm
- Place the arrow on the mounting bracket to point toward the smoke or CO alarm
- Secure the bracket to your ceiling or wall with the included screws
- If mounting on drywall, pre-drill the holes and insert the included anchors
- Attach the listener to the bracket, then slide to lock it in place
Select Your Form Of Monitoring
After you have your entire security system set up and installed, you have the option to choose professional or self-monitoring.
Self-monitoring relies on you or your emergency contacts to contact authorities if your Ring Alarm sounds. Professional monitoring alerts authorities for you and calls you when there’s a security threat detected by Ring Alarm.
Professional monitoring includes a 7-day practice mode to help you learn how to use your new system and develop a routine of changing alarm modes. This helps you reduce the chances of a false alarm. After the 7-day practice mode, your professional monitoring kicks in fully.
You can sign up for professional or self-monitoring at any time, and there is no contract requirement.
Emergency Contacts
If you opt for professional monitoring, you’ll set up emergency contacts, which are people you trust to answer the call and give orders to send authorities to your home if you can’t be reached.
Make sure your emergency contacts can:
- Answer their phone and handle alarm emergencies
- Respond to your home if assistance is needed
- Unlock your home to give emergency responders access to your home if necessary
- Use your Ring Alarm and disarm it, if asked by authorities
Verbal Password
You only need a verbal password if you opt for professional monitoring. If your system triggers, the monitoring station calls you (or your emergency contacts) and asks you to verify your identity. To do so, you and your emergency contacts must know the verbal password (which you set).
The verbal password can be a single word or a number. It shouldn’t be the same as an access code used to arm and disarm the security system. Verbal passwords should be something you can easily remember and should be stored in a safe place.
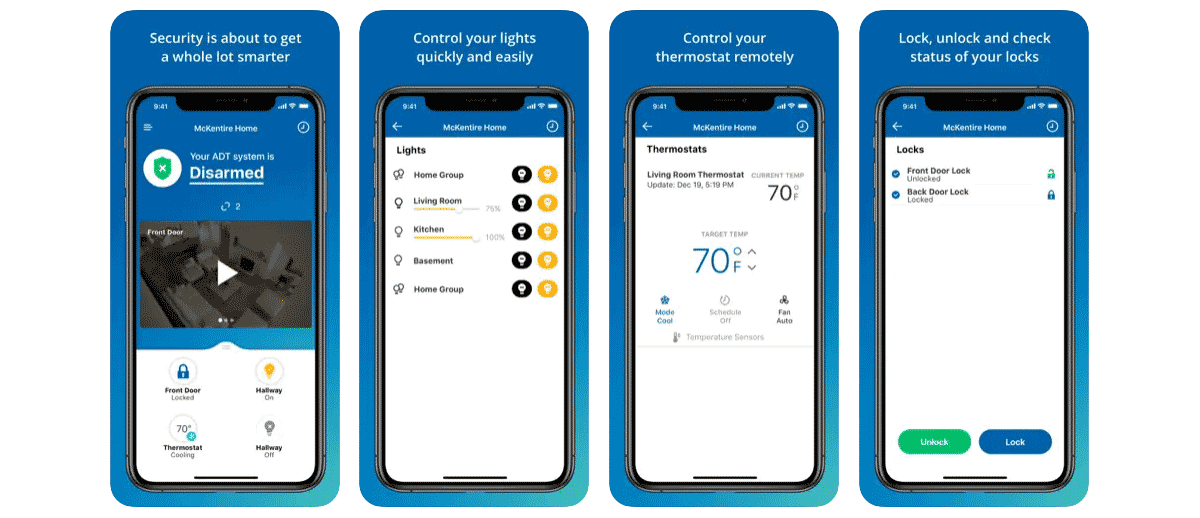
Learn How To Use Ring Alarm
Ring Alarm has three modes:
- Away: By default, all sensors are armed. This mode is best for when you go out and there’s no one home.
- Disarmed: No sensors inside your home are armed. This mode is best for when you’re home and want to go in and out easily.
- Home: Only door and window sensors are armed by default. This mode is best for when someone wants to stay home and feel safe.
You can change the mode of your alarm through the keypad or app. If using the keypad, enter your personal access code, then press the mode button you want. If using the app, simply tap the mode you want.
Ring Alarm Installation FAQs
These are frequently asked questions received from our readers. Got your own? Let us know in the comments!
How Much Does It Cost To Install A Ring Security System?
Installing it yourself is free! That’s the beauty of Ring and other DIY security systems. If you opt for a professional installation (Ring calls this ‘OnTech’), services are a fixed price based on the Ring device being installed. If additional work is required outside the scope of “What’s Included” in the service, the technician can assess the work and quote the additional cost, as applicable.
OnTech Pricing
- Single Ring Install Smart Home Device Installation (Camera, Doorbell, Security Alarm and Retrofit Alarm Kit): $129.99 – $259.99
- Additional Smart Home Device Install (Camera, Doorbell, Security Alarm and Retrofit Alarm Kit): $94.99 – $224.99
- Accessory Smart Home Device Install (Ring Chime, Chime Pro, or up to 3 Ring Sensors): $64.99
Do You Need Wi-Fi To Install Ring?
Yes, and you will also need to use the Ring app as I describe above.
Do You Need A Professional To Install A Ring Alarm System?
No, that’s the beauty of Ring, as it is a DIY system. Of course, if you prefer professional installation, you can opt to have a technician install your Ring Alarm System for a fee, as described above.
What Are Optimal Locations To Install The Equipment?
If you need help deciding the best locations for your security system sensors, we have an article that can help you. Our home security system installation article includes all the major devices that make up a security system to help you decide the best placement for each item.
How’s it going with the installation? Let us know in the comments!